Resource Pool Assignments
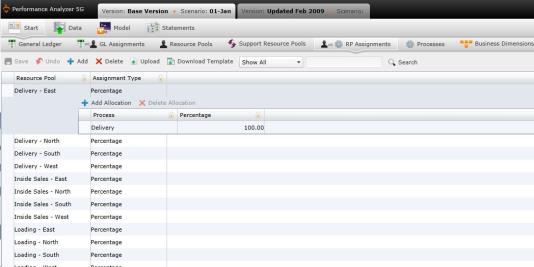
The Resource Pool Assignments panel opens the Resource Pool Assignments screen, where you can view your resources and select the processes where they will be collectively assigned.
View a Resource Assignment
To view a resource assignment, select a resource under the "Resource Pool" column. The "Process" column and "<Assignment Name>" column will open to display the resource's assignments.
Add an Assignment to an Existing Resource
- To add an assignment to an existing resource, select the resource in the "Resource Pool" column.
- Select "Add Allocation." A blank row will open.
- Type the name of the process under the "Process" column.
- Type the assignment data in the "<Assignment Name>" column.
- Select
 .
.
Create a New Resource with Assignment
To manually create a resource with assignment:
- Select
 . A blank row will appear.
- Type the name of the resource under the "Resource Pool" column.
- Select "Assignment Type" column in the new resource's row. A drop-down will open. Select the type of assignment you would like to add.
- Select "Add Allocation." A blank row will appear under the "Process" column.
- Type the name of the process in the blank row.
- Add data in the allocations column (The column will have the name of the Assignment Type you chose in Step 4).
- Select .
To upload files:
- Select
 . A download pop-up screen will appear. Choose your download options and select "OK."
- Open the data template and confirm that the columns and the presentation of data is identical to your records.
- Select
 . The "Upload" panel will open.
- Drag and drop files to the grayed area, or select "Browse Upload."
- Select .
What if the records fail to upload?See Edit Failed Records.
Related Topics:
Introduction to Business Rules
General Ledger Accounts
General Ledger to Resource Pool Assignments
Resource Pools
Resource Pool to Resource Pool Assignments
Processes
Business Dimensions